Tuesday, April 12, 2016

Literacy Group

During my April literacy group, we did activities around The Very Hungry Caterpillar by Eric Carle. A long time ago, I had laminated PCS symbols that corresponded to the book:
I can't find the source of my pictures but you can find similar ones at KizClub.

We handed out some of each of these symbols to the kids and the expectation was that when I read about the item they had they would hand me the symbol. When they handed me the symbol, the kid got to pull the caterpillar through the book.  I have a big board book copy and a hungry caterpillar that would fit through the holes.


Then I had brought some grocery store flyers, and the kids filled completed this sentence:


For each child, I made hungry caterpillars from muffin cups that they could use to learn to spell their name, or to practice spelling their name in a fun way.  I used alphabet stickers, mini muffin cups, scraps of paper, bristol board and velcro.  Dollarama sells patterned muffin cups, and I was able to find these green gingham ones. I could not find red muffin cups, so I improvised and used the gold ones, I already had a home, to make his head.  I used scraps of paper to add the details. Then I laminated all the pieces and velcroed them all together.


Saturday, November 28, 2015

Environmental Print Alphabet Books

Recently, I made a number of Environmental Print Alphabet Books and this is how I did it:

I went to Dollarama and bought 24 pocket Presentation Folders,  Alphabet Stickers, and Black Cardstock.


I added an alphabet letter to the top right corner of each page. I only had 24 pages so I was creative with WX and YZ. I did not think there would be many X foods (as that is what my version will be for) so I made that division substantially unequal.


I created a title page and then the basics of the book was complete.

 https://www.dropbox.com/s/e6zfvx4bsv8yhss/Environmental%20Print%20Cover%20page.pdf?dl=0


You can download your own title page here (or click the picture above).

Here are some of the pages that I have already created in my own book. I used product packaging, flyers and a sticker off of my banana.


Have fun creating your book!


Wednesday, July 15, 2015

How to Set Up a System for Systematic Sequential Phonics They Use


Systematic Sequential Phonics They Use Resource Book
I have been using Carson Dellosa's Systematic Sequential Phonics They Use in my class for the last 2 years. I finally have a system that works for us and enables us to get through the whole lesson in a timely manner.

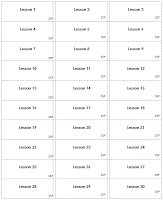
I was able to print off cards that correspond to every lesson in the book. I then laminated them all (see above picture for a small part of the laminated stack), and with the help of some amazing student helpers I was able to cut out the cards and letter tiles.


I made a trip to the dollar store to see what I could find to hold all the cards. I bought 3 of these buckets with lids and a box of envelopes. I did have to go back to get another bucket (for a total of 4) and another box of envelopes (you will need 2).


I also printed off labels for each lesson/envelope. I choose to put the label on the top right so I can see them quickly in the bucket. You can grab the labels here. I printed them on Avery 5160 Labels (30 per page).

This is what the finished boxes look like. I have them labelled with what is in each and the last box has extra envelopes for emergencies.  


I simply take the box that I need for whatever the lesson is that day and the book. I open the box and find the envelope for that lesson. I use the book to guide the lesson, and I use the word cards for the sort and transfer part of the lesson.

http://www.tapfun.com/making-words.htmlhttp://lescapadou.com/LEscapadou_-_Fun_and_Educational_applications_for_iPad_and_IPhone/Word_Wizard_-_Talking_Educational_App_for_iPhone_and_iPad.html


http://appytherapy.com/portfolio-items/lessons-1-5/


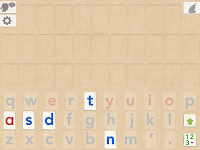
I have my students make the words in a variety of ways. On the iPads, we use Making Words by Tap Fun, Word Wizard by L'Escapadou, Abilipad by AppyTherapy (they have all the templates for every lesson in their library).
2-Sided Alphabet Letter Tiles
However, there are days when we don't use the iPad. We use all sorts of different letters. I have written letters on post-it notes, used an alphabet puzzle or letter tiles.

I have some students that are using the Making Words lessons from Start to Finish Literacy Starters and I use the same system. I do have a different colour bucket for those words.

Sunday, January 4, 2015

Osmo

Over the summer, I heard about and then bought Osmo. These are pieces that let you interact with the iPad in a novel way.

It was a great purchase for my classroom. I have used it with one student in particular. He loves that he can play with the iPad with toys. What is better than combining too loves, Thomas the Tank Engine and an iPad!

We started with playing with the Newton app, this is from their website:

newton iconNewton

Use your creative noggin and inventive objects like a hand‑drawn basket, grandma's glasses, dad's keys, or anything around you to guide falling on‑screen balls into targeted zones.


We started with using with the tracks. He would position them on the paper (the camera was picking up all the 'wood grain' on the table so we used the paper). He liked that the tracks would show up on the iPad screen. He was using the edges to make the balls bounce where they needed to go.

 Then we moved on to using the accessories, who doesn't love playing with a cow!


Then we moved on to the Words app, again from their website:
words icon

Words

Be the first to guess and spell out the on‑screen hidden word by tossing down real‑life letters faster than your friends. A related picture gives the clue.


 He has some trouble with beginning sounds but he persevered and continued playing. 


 Then we moved on to the Tangrams app, again from their website:
tangram icon

Tangram

Arrange tangible puzzle pieces into matching on‑screen shapes. Play with a friend or challenge yourself to more advanced levels as your handy‑work lights up with each victory.


He loved this app! He liked that he could choose which picture to work on and I liked that the difficulty increased the more we played. Once we moved on to the blue level he said "this is too hard." He did not like that he was not getting any hints if the pieces were in the correct location.

Thursday, September 11, 2014

Writing Without Standards

In February, my class started to write! I had been reading about various ways to do this for my class. I decided to try it.

To start out you don't need much - just 2 things to get started.

1) Pictures are important - they help you to have a context for what your student in writing about. I used extra pictures from our scrapbooks, familiar symbols, and I would print off pictures of items that my students liked - favourite cartoon characters, apps, toys, etc.

2 ) Something to write in - I choose small notebooks as that is what I had in a cupboard.

Here are some samples from one of my students.


It is hard to see but she did print the letters 'sesame str.' I took those letters and wrote the whole phrase. I reinforced the letters that my student wrote by underlining the letters that we have in common.


In this example, she doodled but eventually wrote the word SUN. Again attention was drawn to the letters that she used and that word was turned into a sentence.


In this example, I used the app Abilipad to do some writing with the same student. I thought that I had created 3 pages to be written on over 3 days but she had other ideas! She went back and forth between the three pictures and would write on all of them. After I printed out the pictures, I highlighted the words that she independently typed.

Here is a one page handout to explain Writing Without Standards:

All of my students are able to use a traditional pencil to write so I do not have to use alternative pencils.  If your student/child is unable to print traditionally, use an alternative pencil. It could be a keyboard, eye gaze chart, alphabet flip chart, etc.


If you would like more information about Writing Without Standards you can access these resources.

Wednesday, June 11, 2014

Worksheet Wednesday --- Writing Numbers

I encountered a perplexing dilemma in my class. I had a student who was able to do all of these things:
-receptively identify numbers up to 75 (for example, find 23 with a calendar)
-expressively identify numbers up to 75 (for example, what number is this?)
-count out from a larger set of 30 (for example, give me 15 bears)
-count items up to 50 (for example, how many cars are there?)

We have been working extensively on learning to add with this student.  He progressed to being able to able to add a two digit number to a single digit number (14+8=), however he would find the answer of 22 and then just look at an adult that was close by and repeat 22 over and over again. He knew the correct answer but had no idea how to print the numbers 20 onwards.

To tackle this perplexing dilemma, I created a set of worksheets where the student has to do 2 tasks but I am sure there are other ways of using these materials.


Task 1 - sequence numbers 0-30 on blank charts, there are a variety of column widths (3, 4, 5, and 6).  I have this task laminated and he arranged the number tiles to complete the series.

Task 2 - there are various grids that have missing numbers and the students in expected to print in the missing numbers.

Click here for the data sheet that I use in my classroom, it is not very fancy but it works for what I need it for.

If you would like to try this 10 page pack out for free you can go to:
http://www.teacherspayteachers.com/Product/Fill-in-the-Numbers-1-30-1209995


I am linking up with Worksheet Wednesday through The Teaching Tribune.

Thursday, May 29, 2014

Touch Math Cards

This school year I have been using Touch Math extensively in my classroom with a lot of success. So I thought I would share how we have made our own materials.

I had each of my students in my class make their own flashcards to use to learn the Touch Math system of touching dots.  You will need:
  • Colour Coding Labels - small circle stickers
  • White Reinforcements - before starting the activity I coloured them with various Sharpies to have them stand out on the white paper
  • Flashcards for #1-9 - you can see a set here (you need a free membership to access)

I gave each student a set of flashcards that I had pre-cut for them.  Then each student had the chance to choose which colours they wanted to use, my only rule was it could not be the same for the dots and the reinforcements.  Luckily it all worked out and everyone received the colours they wanted.
I then showed my set of cards and I had the students copy me in placing the dots and rings for each number.  I laminated them and we have been using them all year.


 One student came into my class just starting to add using Touch Math.  This week he has been using Touch Math strategies to add 3 digit numbers with and without regrouping and to subtract two digit numbers with and without regrouping.  
Two students came into my class never having used Touch Math and through the Touch Math App, by creating our own Touch Math Flashcards and using flashcards without the dots.  Both of these students are now adding numbers up to 18.