Saturday, November 28, 2015

Environmental Print Alphabet Books

Recently, I made a number of Environmental Print Alphabet Books and this is how I did it:

I went to Dollarama and bought 24 pocket Presentation Folders,  Alphabet Stickers, and Black Cardstock.


I added an alphabet letter to the top right corner of each page. I only had 24 pages so I was creative with WX and YZ. I did not think there would be many X foods (as that is what my version will be for) so I made that division substantially unequal.


I created a title page and then the basics of the book was complete.

 https://www.dropbox.com/s/e6zfvx4bsv8yhss/Environmental%20Print%20Cover%20page.pdf?dl=0


You can download your own title page here (or click the picture above).

Here are some of the pages that I have already created in my own book. I used product packaging, flyers and a sticker off of my banana.


Have fun creating your book!


Wednesday, July 15, 2015

How to Set Up a System for Systematic Sequential Phonics They Use


Systematic Sequential Phonics They Use Resource Book
I have been using Carson Dellosa's Systematic Sequential Phonics They Use in my class for the last 2 years. I finally have a system that works for us and enables us to get through the whole lesson in a timely manner.

I was able to print off cards that correspond to every lesson in the book. I then laminated them all (see above picture for a small part of the laminated stack), and with the help of some amazing student helpers I was able to cut out the cards and letter tiles.


I made a trip to the dollar store to see what I could find to hold all the cards. I bought 3 of these buckets with lids and a box of envelopes. I did have to go back to get another bucket (for a total of 4) and another box of envelopes (you will need 2).


I also printed off labels for each lesson/envelope. I choose to put the label on the top right so I can see them quickly in the bucket. You can grab the labels here. I printed them on Avery 5160 Labels (30 per page).

This is what the finished boxes look like. I have them labelled with what is in each and the last box has extra envelopes for emergencies.  


I simply take the box that I need for whatever the lesson is that day and the book. I open the box and find the envelope for that lesson. I use the book to guide the lesson, and I use the word cards for the sort and transfer part of the lesson.

http://www.tapfun.com/making-words.htmlhttp://lescapadou.com/LEscapadou_-_Fun_and_Educational_applications_for_iPad_and_IPhone/Word_Wizard_-_Talking_Educational_App_for_iPhone_and_iPad.html


http://appytherapy.com/portfolio-items/lessons-1-5/


I have my students make the words in a variety of ways. On the iPads, we use Making Words by Tap Fun, Word Wizard by L'Escapadou, Abilipad by AppyTherapy (they have all the templates for every lesson in their library).
2-Sided Alphabet Letter Tiles
However, there are days when we don't use the iPad. We use all sorts of different letters. I have written letters on post-it notes, used an alphabet puzzle or letter tiles.

I have some students that are using the Making Words lessons from Start to Finish Literacy Starters and I use the same system. I do have a different colour bucket for those words.

Sunday, January 4, 2015

Osmo

Over the summer, I heard about and then bought Osmo. These are pieces that let you interact with the iPad in a novel way.

It was a great purchase for my classroom. I have used it with one student in particular. He loves that he can play with the iPad with toys. What is better than combining too loves, Thomas the Tank Engine and an iPad!

We started with playing with the Newton app, this is from their website:

newton iconNewton

Use your creative noggin and inventive objects like a hand‑drawn basket, grandma's glasses, dad's keys, or anything around you to guide falling on‑screen balls into targeted zones.


We started with using with the tracks. He would position them on the paper (the camera was picking up all the 'wood grain' on the table so we used the paper). He liked that the tracks would show up on the iPad screen. He was using the edges to make the balls bounce where they needed to go.

 Then we moved on to using the accessories, who doesn't love playing with a cow!


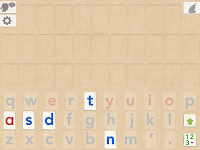
Then we moved on to the Words app, again from their website:
words icon

Words

Be the first to guess and spell out the on‑screen hidden word by tossing down real‑life letters faster than your friends. A related picture gives the clue.


 He has some trouble with beginning sounds but he persevered and continued playing. 


 Then we moved on to the Tangrams app, again from their website:
tangram icon

Tangram

Arrange tangible puzzle pieces into matching on‑screen shapes. Play with a friend or challenge yourself to more advanced levels as your handy‑work lights up with each victory.


He loved this app! He liked that he could choose which picture to work on and I liked that the difficulty increased the more we played. Once we moved on to the blue level he said "this is too hard." He did not like that he was not getting any hints if the pieces were in the correct location.